Network Address Translation (NAT) is a crucial element in the Amazon Web Services (AWS) ecosystem, enabling seamless communication between private subnets and the internet. In this blog, we explore the essentials of NAT service in AWS installing “NAT Gateway” and “NAT Instance” in ensuring secure outbound internet connectivity for instances in private subnets.
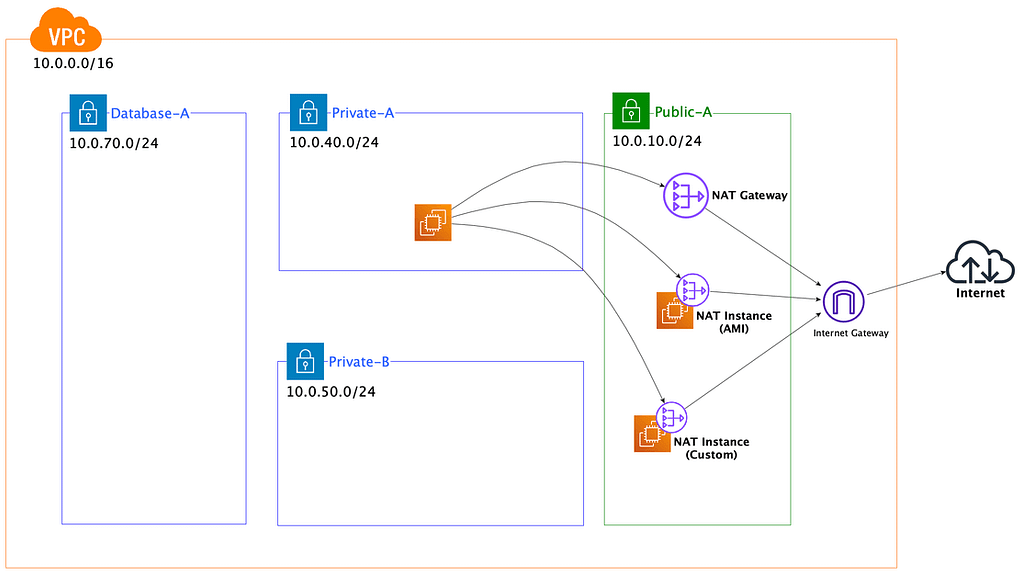
Image of the VPC we are setting up in this blog
1. What is NAT?
2. NAT Gateway
The step is quite straightforward.
3. NAT Instance from AMI
This step is also easy. And we got full control of NAT instance.
4. NAT Instance from scratch
We will take the following steps in this video.
Install EC2
Configure NAT function
Troubleshooting
The command works at the beginning but when the NAT instance was restarted, the NAT function stop working…. So, we will address this issue in this video. The detail step is described below.
1. Copy & Paste those and run from terminal Reference: https://docs.aws.amazon.com/vpc/latest/userguide/VPC_NAT_Instance.html#create-nat-ami
sudo sysctl -w net.ipv4.ip_forward=1
sudo /sbin/iptables -t nat -A POSTROUTING -o eth0 -j MASQUERADE
sudo yum install iptables-services
sudo service iptables save